
How to clean car interior plastic trim comes down to two things most people miss: using the right cleaner for the soil you have (dust, body oils, sunscreen) and finishing with a non-greasy protectant so the surface looks clean, not shiny-wet.
If your plastic trim keeps looking blotchy, attracting dust, or turning into a glare-fest on sunny days, it’s usually not because you “didn’t scrub enough.” It’s because the product choice or wipe-down method leaves residue behind, or you’re applying dressing onto dirt.
This guide walks through a practical, repeatable process, plus a quick table to match products to situations, and a short checklist to help you decide when you need deeper cleaning versus a simple maintenance wipe.

Why interior plastic trim gets dull, sticky, or “too shiny”
Interior plastics are a magnet for light contamination. Airborne dust settles, hands add oils, and common everyday products like hand lotion and sunscreen transfer and bake in.
- Residue buildup: Many “quick shine” sprays leave a film that looks good for a day, then turns streaky and attracts dust.
- Body oils and skin products: Door pulls, steering column shrouds, center consoles often get a greasy halo that plain wipes can’t cut.
- Outgassing haze: Some interiors develop a light film over time, especially on smooth plastics; it can make trim look gray or smeared.
- Over-scrubbing textured grain: Aggressive pads can burnish texture and create permanent shiny spots, especially on softer plastics.
According to the U.S. Environmental Protection Agency (EPA), cleaning products should be used according to label directions and with adequate ventilation, which matters in a closed cabin where vapors can linger.
Quick self-check: what kind of mess are you dealing with?
Before you grab a random bottle, do a 30-second check. It saves time and helps you avoid chasing streaks that keep coming back.
- Dry dust only: Wipes off clean with a damp microfiber, no smearing.
- Oily film: Finger swipe leaves a shiny trail, microfiber drags, smear marks appear.
- Stains/spots: White sunscreen dots, coffee splatter, scuffs on kick panels.
- Old dressing: Surface feels slick or tacky, looks glossy even when “clean.”
Key takeaway: If you see smearing after wiping with water, you’re not dealing with “dirt,” you’re dealing with oils or residue, and you’ll need a real interior cleaner and a proper dry buff.
What to use (and what to avoid): a practical product guide
You don’t need a cabinet full of products. You do need to avoid a few common traps, especially anything that leaves the cabin slippery or reflective.
Recommended tools
- 2–4 clean microfiber towels (one for cleaning, one for rinse/wipe, one for final buff)
- Soft interior detailing brush (for seams, texture, vents)
- Interior cleaner (APC diluted appropriately can work, but interior-specific cleaners are often more forgiving)
- Optional: protectant with a matte or satin finish
Avoid in most cases
- High-gloss silicone dressings on dashboards: glare and a “wet” look, plus dust attraction
- Harsh solvents (acetone, lacquer thinner): can discolor or soften plastics
- Magic eraser everywhere: can permanently change sheen on textured trim; if used, spot-test and go very light
Cheat sheet table: match your situation to the approach
| Situation | What usually works | What causes streaks |
|---|---|---|
| Light dust on dash/doors | Damp microfiber, then dry buff | Over-wetting, skipping the final dry towel |
| Oily console/door pulls | Interior cleaner + microfiber, follow with a second towel | Using one towel until it’s saturated |
| Textured grain with grime in pores | Cleaner + soft brush agitation, then wipe clean | Too much product left sitting, not extracting residue |
| Old shiny dressing buildup | Multiple passes with cleaner, controlled brush work | Adding more dressing on top of residue |
| Scuffs on kick panels | Cleaner + microfiber, careful spot work | Abrasives that change the plastic’s finish |
Step-by-step: clean plastic trim for a factory matte (or a controlled shine)
This is the repeatable method that tends to work across most vehicles, from newer soft-touch trim to older harder plastics.
1) Dry dust first (yes, before spraying anything)
Use a dry microfiber or a soft brush to pull dust out of seams and texture. If you spray cleaner onto dusty trim, you often create gray slurry that smears.
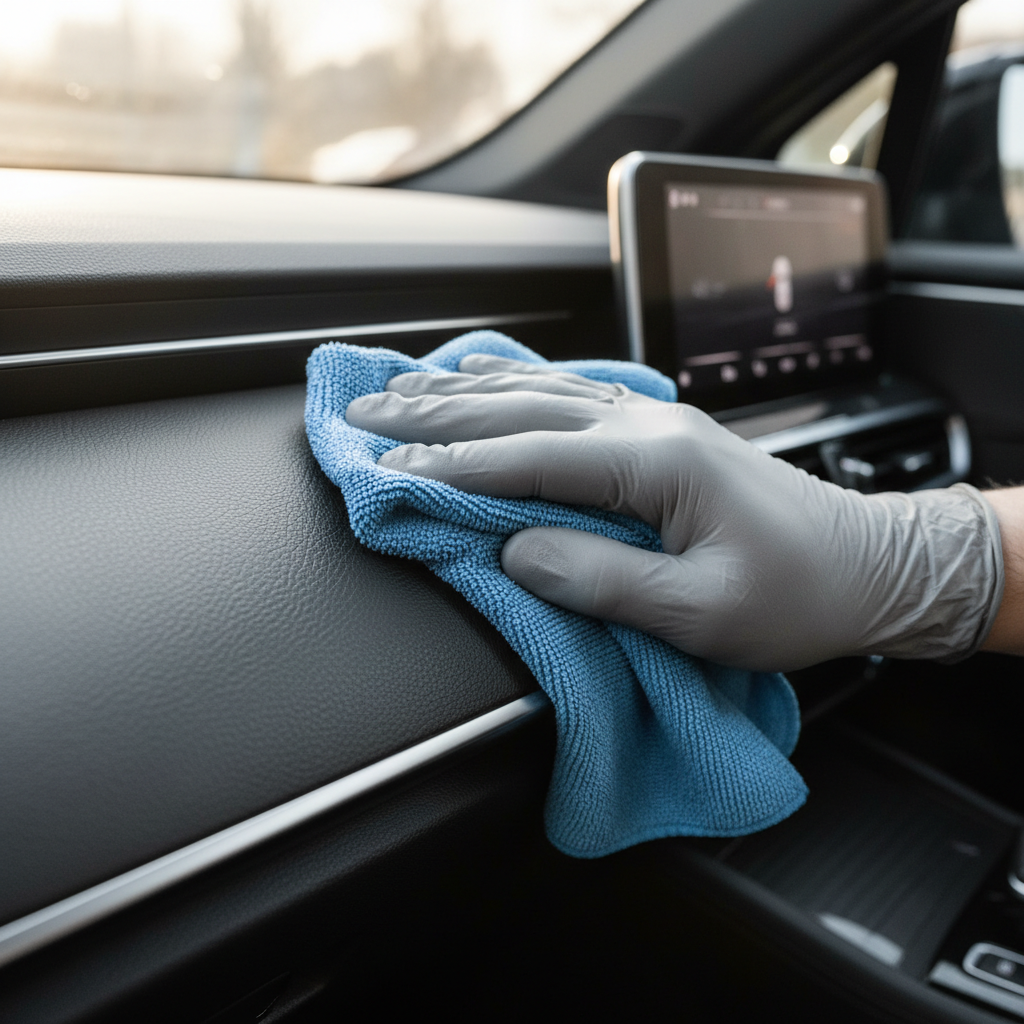
2) Spray product onto the towel, not the panel (most of the time)
For dashboards, infotainment surrounds, and areas near screens, mist the towel lightly and wipe. It reduces overspray and helps keep product out of electronics and gauge clusters.
3) Agitate textured areas gently
For grainy door panels and consoles, apply cleaner, then use a soft interior brush with light pressure. You’re loosening grime from the texture, not sanding the plastic.
4) Wipe with a second towel to remove residue
This is where the “plastic still looks greasy” problem often gets solved. A second clean microfiber lifts what the first towel left behind.
5) Final buff to even out the finish
Use a dry microfiber for a quick pass. If the finish looks uneven, you usually have leftover product, switch to a clean towel and do one more light wipe.
6) Add protectant only if you actually want it
If you like a clean, OEM look, choose a matte or low-sheen protectant and apply sparingly. If you prefer some shine, build it gradually rather than soaking the surface.

How to make interior plastic trim shine (without the greasy look)
If “shine” is your goal, aim for even gloss, not wet gloss. The wet look usually means excess dressing sitting on top, which becomes dust bait and can transfer to clothes.
- Pick the right finish: satin for most daily drivers, gloss only for accent pieces where glare won’t bother you.
- Apply to an applicator, then spread thinly, working in small sections.
- Let it set per label directions, then lightly buff. This step controls streaks and tackiness.
- Keep steering wheel and pedals dressing-free: slick residue can be a safety issue; if you accidentally get product there, clean again with an interior cleaner and dry thoroughly.
According to the National Highway Traffic Safety Administration (NHTSA), safe vehicle operation includes maintaining proper control of the vehicle; anything that reduces grip on contact surfaces can be a risk. In practice, that means avoiding dressings on high-touch driving controls.
Common mistakes that cause streaks, haze, or rapid re-dusting
- Using too much product: most interior cleaners work better with light application and multiple towel flips.
- One-towel cleaning: once a towel gets loaded, it starts spreading residue.
- Ignoring seams and edges: cleaner pools around trim lines, dries, and leaves visible borders.
- Cleaning hot surfaces: product can flash-dry and streak, try to work in shade or let the cabin cool.
- Overusing “all-purpose” degreasers: strong mixes can dull some plastics; if you use an APC, start with a mild dilution and spot-test.
When you may need a pro detailer (or a more specialized approach)
Most trim cleaning is DIY-friendly, but a few situations deserve more caution.
- Sticky, degraded soft-touch coatings: some rubberized coatings break down and feel tacky; cleaning helps temporarily, but refinishing or replacement may be the real fix.
- White stress marks or discoloration: aggressive cleaning can make it worse, a pro can assess whether restoration is possible.
- Mold or unknown spills: if you suspect biological growth, it’s safer to consult a professional who can evaluate materials and containment.
If you’re unsure how a cleaner will react, test in an inconspicuous area first, and follow product safety guidance, including ventilation and glove use when recommended.
Conclusion: a clean look beats “more shine” most days
How to clean car interior plastic trim is mostly about restraint: remove dry dust first, clean oils with the right product, then spend an extra minute on residue removal and buffing. That’s what gets you an even finish that stays good for longer than a single drive.
If you want a simple next step, do this: use two microfiber towels on your next wipe-down, one to clean and one to dry-buff, then decide if you even need a protectant after you see the natural finish.
FAQ
How do I clean car interior plastic trim without leaving streaks?
Use less product than you think, wipe with one microfiber, then immediately follow with a second clean towel to pick up residue. Streaks usually come from leftover cleaner or dressing drying on the surface.
Can I use dish soap to clean interior plastic?
In a pinch, a very mild mix can remove light grime, but it may leave its own film and isn’t designed for interior materials. If you try it, use a damp towel to “rinse” and dry-buff after.
What’s the best way to remove greasy fingerprints on the center console?
An interior cleaner on a microfiber (not sprayed directly onto electronics) plus a second towel for a follow-up wipe tends to work. If it still smears, you may be removing old dressing and need a couple passes.
Is a shiny dashboard finish a bad idea?
Many drivers dislike it because glare can be distracting in bright sun, and some dressings feel slick. If you like shine, keep it controlled and avoid the top of the dash and driving controls.
How often should I clean plastic trim inside my car?
Light maintenance wipes weekly or biweekly often keep things stable, while deeper cleaning might be monthly or seasonally, depending on kids, pets, and whether you park outside.
Can I use a Magic Eraser on plastic trim scuffs?
Sometimes it reduces visible scuffs, but it can also change sheen because it’s mildly abrasive. Spot-test first and use minimal pressure, especially on soft-touch or textured areas.
What should I use to protect interior plastic from UV?
A dedicated interior protectant that lists UV protection and dries to a matte or satin finish is a common choice. Apply thinly and buff; too much product often causes the “dust magnet” problem.
If you’re trying to keep an OEM-looking interior without spending your weekend experimenting, a consistent routine matters more than chasing the shiniest dressing, get a gentle interior cleaner, a soft brush, and enough microfiber towels so you’re not smearing yesterday’s residue across today’s trim.