
How to replace car brake fluid flush is one of those maintenance jobs that sounds simple until you realize one mistake can leave you with a soft pedal, warning lights, or worse, weak braking when you need it most.
If your brake pedal feels spongy, your fluid looks dark, or it has been a couple of years since the last service, a flush is often the correct fix, not just “topping off.” Fresh fluid helps maintain consistent brake pressure and protects expensive parts like the ABS hydraulic unit.
I am going to walk you through a practical, step-by-step process, plus the “decision points” that determine whether you can do it solo, whether you need a helper, and when it is smarter to hand it to a shop. No hero moves, just clean work.
When you actually need a brake fluid flush (and when you don’t)
Brake fluid is hygroscopic, meaning it absorbs moisture over time, which can lower its boiling point and encourage internal corrosion. According to NHTSA, brake fluid issues can contribute to reduced braking performance, and maintenance should follow the manufacturer schedule and safe service procedures.
In real garages, people usually end up doing a flush for one of these reasons:
- Time interval: many vehicles call for replacement around every 2–3 years, but it varies by make and model.
- Dark or contaminated fluid: fresh fluid is usually clear to light amber; old fluid often turns tea-brown.
- Soft pedal after brake work: sometimes air got introduced during a caliper, hose, or master cylinder job.
- ABS service: if the system was opened, a full flush is commonly recommended.
What a flush will not fix: a pedal that sinks because of an internal master cylinder leak, a vacuum booster problem, an external leak at a caliper/hose, or warped rotors causing vibration. If you see wetness around brake lines, calipers, or the master cylinder, treat that as a repair issue first.
Tools, fluid type, and setup (get these right before you start)
The biggest time-wasters are using the wrong fluid spec, rounding a bleeder screw, or letting the reservoir run low. Prep matters more than people want to admit.
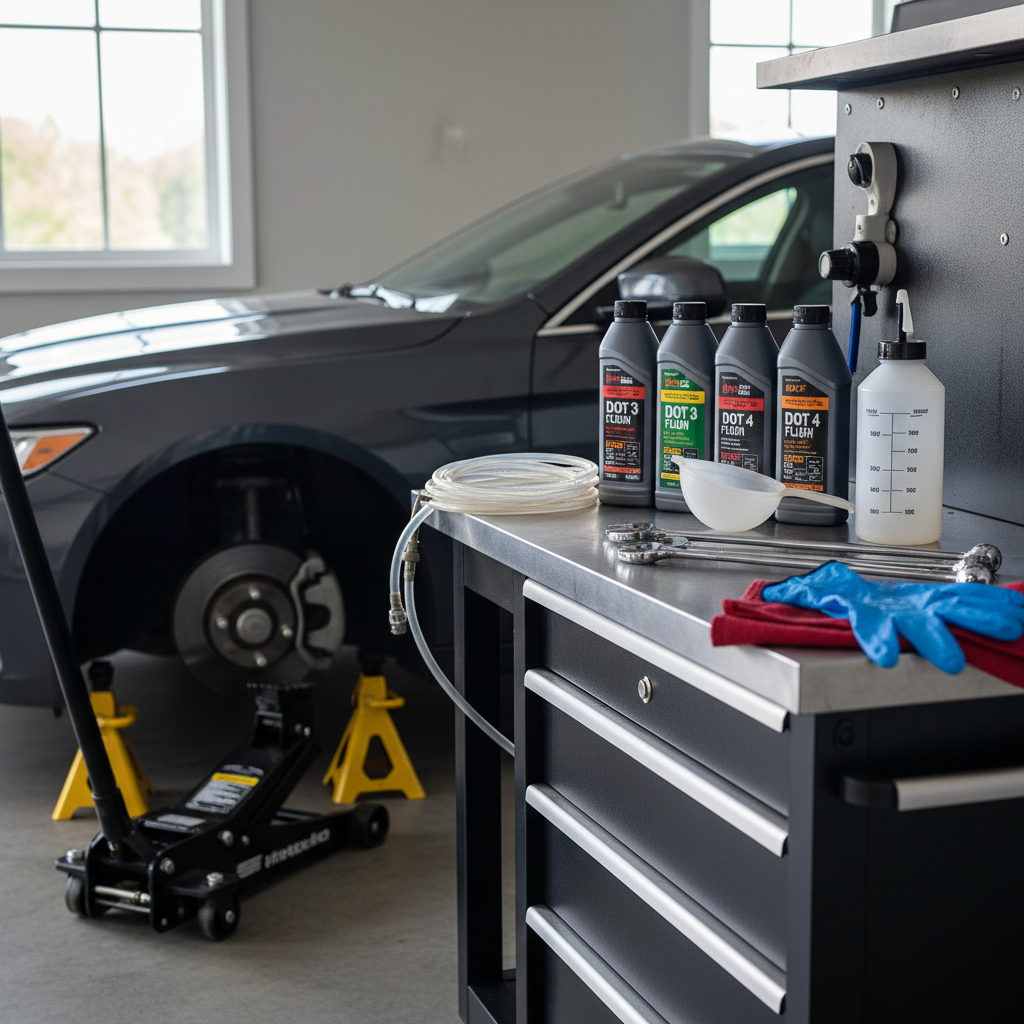
Quick tool list
- Correct brake fluid (check cap and owner’s manual): commonly DOT 3 or DOT 4; DOT 5 is silicone-based and usually not interchangeable.
- Line/flare nut wrench for bleeders (often 8mm, 10mm, or 11mm) to reduce rounding.
- Clear vinyl hose and a catch bottle (or a proper bleeder bottle with check valve).
- Floor jack, jack stands, wheel chocks, lug wrench.
- Nitrile gloves, shop towels, brake cleaner, safety glasses.
- Optional but helpful: pressure bleeder or vacuum bleeder.
DOT fluid cheat sheet (common in the U.S.)
| Fluid | Typical use | Notes |
|---|---|---|
| DOT 3 | Many daily drivers | Usually OK where DOT 3 is specified; do not assume it upgrades DOT 4 systems |
| DOT 4 | Some newer cars, performance brakes | Often higher boiling point; verify compatibility and spec |
| DOT 5 | Specialty/classic applications | Silicone-based; typically not for ABS systems unless explicitly specified |
| DOT 5.1 | Some high-performance applications | Glycol-based like DOT 3/4; still confirm what your vehicle requires |
Key point: brake fluid damages paint. Cover fenders, wipe spills immediately, and keep the bottle sealed since the fluid absorbs moisture from air.

Self-check: are you set up for a DIY flush?
This is where you save yourself a bad afternoon. A DIY flush is usually reasonable if the system is intact and you can work safely on stands.
- You can securely lift the vehicle and remove all wheels (or at least access bleeders).
- Bleeder screws look serviceable, not rusted into one solid lump.
- No signs of leaks, and brake pedal is usable before you start.
- You can identify the correct bleed order from a service manual or reliable manufacturer info.
Consider stopping and getting help if: bleeders are heavily corroded, your car has a tricky ABS bleed procedure, or you already have a very low pedal with no obvious cause. According to AAA, braking system work is safety-critical, and if you are uncertain about procedure or results, professional service is the safer choice.
How to replace car brake fluid flush: step-by-step procedure
This is the “normal” approach for most passenger vehicles: exchange old fluid at each caliper/wheel cylinder until clean fluid comes out, while keeping the master cylinder reservoir topped up. The exact bleed order can vary, so check your vehicle info.
Step 1: confirm fluid spec and bleed order
Many cars use a farthest-to-closest sequence from the master cylinder, often RR → LR → RF → LF, but some vehicles specify a different pattern. If your manual calls for a special order, follow that.
Step 2: prep the reservoir (do not drain it empty)
- Clean the reservoir cap area so dirt does not fall in.
- Use a turkey baster or syringe to remove most old fluid from the reservoir, but leave some covering the ports.
- Refill with fresh fluid to the MAX line.
Never reuse old fluid from your catch bottle. Once it is out, it is out.
Step 3: lift the car safely and remove wheels
Chock wheels, use jack stands on solid points, and keep the vehicle stable. If you are working on a sloped driveway, it is usually not worth the risk.
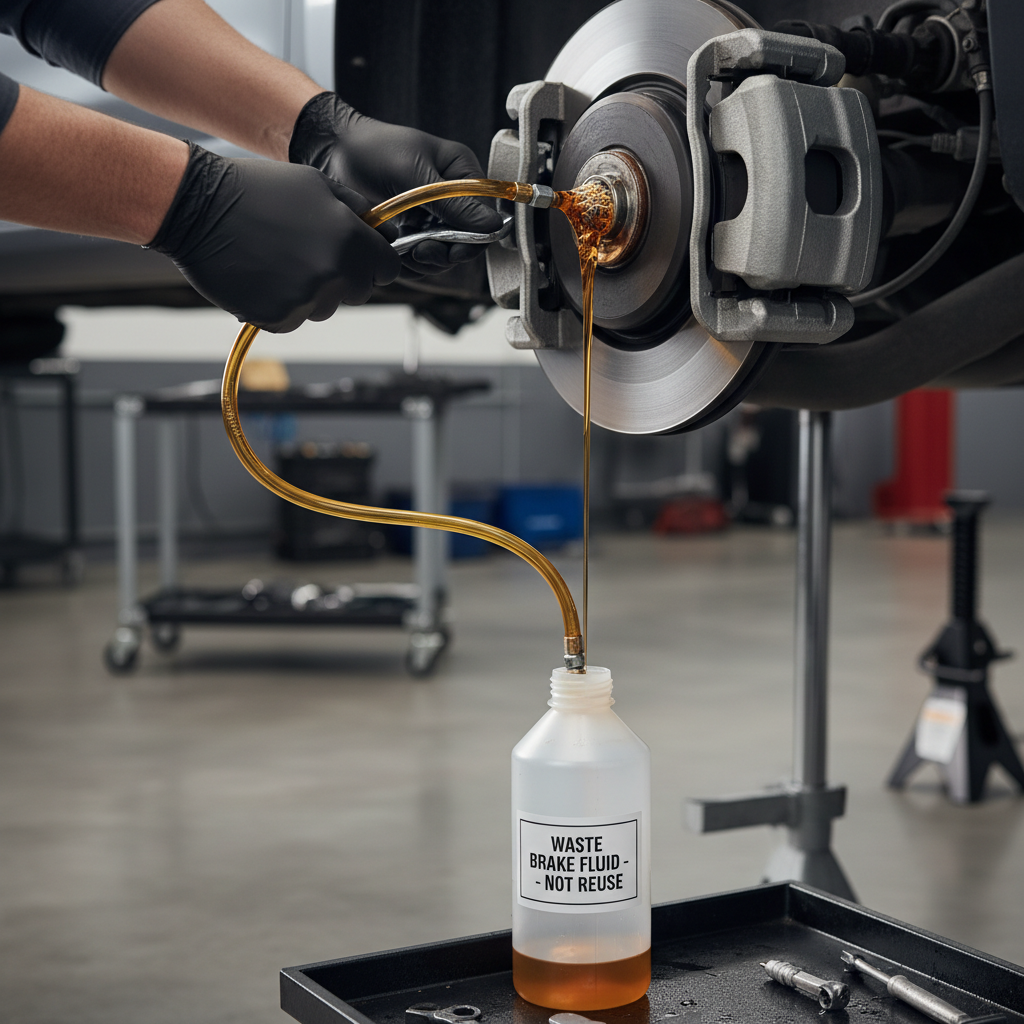
Step 4: bleed one wheel at a time
At the first wheel in your bleed order:
- Find the bleeder screw, remove rubber cap, spray with penetrant if needed.
- Put the correct wrench on the bleeder, then attach a clear hose leading into a catch bottle.
- Open the bleeder about a quarter turn.
Step 5: choose your bleeding method (helper, vacuum, or pressure)
Two-person “pump and hold” is common:
- Helper presses pedal slowly 3–5 times, then holds firm pressure.
- You open the bleeder briefly, fluid and air flow out, then you close it before the pedal reaches the floor.
- Helper releases pedal only after you close the bleeder.
Vacuum bleeding pulls fluid from the bleeder, but can sometimes draw air around loose threads, which looks like bubbles even when the line is fine. You can reduce that by lightly sealing bleeder threads with appropriate grease, keeping it off the hole.
Pressure bleeding is often the cleanest if you have the tool, it pushes fresh fluid from the reservoir side and tends to be consistent.
Step 6: keep the reservoir topped up
This is the rule that keeps you out of trouble: do not let the master cylinder reservoir drop below MIN. Check it every few cycles and refill with fresh fluid.
Step 7: watch for the change from old to fresh fluid
In the clear hose, old fluid often looks darker, sometimes with tiny debris. Continue until the fluid runs clear and bubble-free for several cycles. The exact amount per wheel varies, so use color and bubbles as your guide rather than chasing a number.
Step 8: snug the bleeders, clean up, and repeat for each wheel
Close bleeders firmly but do not over-torque. Wipe any spilled fluid, reinstall caps, and move to the next wheel.
After-flush checks: pedal feel, leaks, and a safe test drive
Before you celebrate, do a few checks that catch 90% of problems:
- Reservoir level set to MAX and cap installed.
- Pedal feel: with engine off, pedal should feel firm and not slowly sink.
- Visual leak check: look at bleeders, hose connections, and around the master cylinder.
- ABS/brake warning lights: if a light stays on, do not assume it clears itself.
For the test drive, start in an empty lot, low speed, gentle stops. If the pedal feels inconsistent or long, stop and re-check your work. Many times it is air at one wheel or a reservoir that got too low mid-process.
Common mistakes that cause a soft pedal (and how to avoid them)
- Letting the reservoir run low: this can pull air into the master cylinder and sometimes into the ABS modulator, which is harder to purge.
- Wrong bleed order: not always catastrophic, but it can make bleeding take longer and leave air trapped.
- Over-tightening bleeders: can strip threads or crack components.
- Mixing fluid types blindly: check DOT spec; do not pour DOT 5 into a DOT 3/4 system unless the manufacturer explicitly calls for it.
- Pumping the pedal to the floor aggressively: on some older master cylinders, this can push seals into areas they normally do not travel, potentially causing issues.
If you keep seeing tiny bubbles with a vacuum bleeder, consider switching methods or checking for air entering around the bleeder threads rather than assuming the line still has air.
When it’s worth bringing in a professional
A basic flush is straightforward, but there are situations where the “extra step” requires scan tools or deeper troubleshooting. In these cases, a shop visit is usually the safer call:
- ABS module bleed procedure required by your manufacturer (some need a scan tool to cycle valves).
- Bleeder screw snapped, rounded, or seized.
- Brake warning light on after the flush, especially if you also feel a low pedal.
- Any sign of fluid leaking under pressure.
According to SAE International, proper brake service depends on following manufacturer procedures and using correct tools, especially on modern ABS and stability-control systems, so if you cannot confirm your car’s process, it is reasonable to outsource.
Practical tips to make the job easier (and cleaner)
- Crack bleeders loose before you fully commit, if one refuses to move, you find out early.
- Use a clear hose long enough to loop upward a bit, it helps you see bubbles clearly.
- Keep a dedicated “brake fluid only” bottle for waste, and dispose of it like other automotive fluids per local rules.
- If you live in a humid area, buy fluid in smaller bottles so you do not store half-used containers for months.
Conclusion: a brake fluid flush is simple, but not casual
If you follow the correct fluid spec, keep the reservoir topped up, and confirm a firm pedal before driving, a flush can restore consistent braking and reduce long-term wear inside the system. Your next action is straightforward: look up your vehicle’s bleed order, gather the right DOT fluid, and decide whether you want a helper or a pressure bleeder so the job stays calm instead of chaotic.
FAQ
How long does a brake fluid flush take at home?
Many DIYers finish in 60–120 minutes, assuming bleeders cooperate and you do not need ABS cycling. Rusty hardware can add a lot of time.
Can I just top off brake fluid instead of doing a flush?
Topping off helps only if the fluid is slightly low due to pad wear and the fluid is still in good condition. If the fluid is dark or the service interval is overdue, a full exchange tends to make more sense.
What happens if I use DOT 4 in a DOT 3 system?
In many cases DOT 4 is compatible with DOT 3 because both are glycol-based, but you should still follow the manufacturer spec since seals, ABS behavior, and warranty considerations can vary.
Why is my brake pedal still spongy after bleeding?
Common causes include air still trapped at one caliper, the reservoir dropping too low during the process, or a leak. If the pedal slowly sinks, that can point to a master cylinder issue and you should consider professional diagnosis.
Do I need a scan tool to bleed brakes with ABS?
Sometimes yes, sometimes no. Some vehicles require cycling the ABS valves after the system opens, and that step may need a scan tool. Check service information for your exact model.
How do I know when the fluid is fully flushed?
You are looking for consistently clear fluid at each wheel with no visible bubbles, plus a firm pedal. Color change is usually more reliable than guessing volume.
Is it safe to drive right after a brake fluid flush?
It can be, but only after a firm pedal check and a low-speed test in a safe area. If anything feels off, stop and re-check rather than “hoping it beds in.”
How should I dispose of old brake fluid?
Do not pour it down a drain. Many local recycling centers and auto parts stores accept automotive fluids, but rules vary by city and county.
If you are doing this in a small driveway, or you just want a more predictable process, a pressure bleeder kit and the correct adapters can make the flush cleaner and less stressful, and many people find it pays off after one or two brake jobs.