
How to replace cabin air filter is usually a straightforward DIY job, but it feels confusing the first time because the filter can be hidden behind panels, glove boxes, or trim that looks “not meant to touch.”
If your vents smell musty, airflow feels weak, or allergies act up when the fan runs, a clogged cabin filter is a common culprit. It’s not glamorous maintenance, but it affects what you breathe and how hard your HVAC system works.
The catch is that different cars hide the filter in different places, and installing it backward can undo the benefit. Below is the practical path: identify your setup, swap the part cleanly, and avoid the small mistakes that waste time.
When a cabin air filter needs replacing (and what you’ll notice)
Most people change the engine air filter and forget the cabin side even exists. The cabin filter’s job is to trap dust, pollen, and debris before air reaches the blower and vents, so symptoms tend to show up in comfort, not engine performance.
- Reduced airflow even when the fan is on high
- Musty or dirty vent odor, especially when AC starts
- More window fogging than usual (HVAC struggles to move air)
- Sneezing/irritation that ramps up when the fan runs (varies by person)
- New noises from the blower area (leaves and debris near the filter)
According to the U.S. Environmental Protection Agency (EPA), indoor air quality can be impacted by particles and pollutants, and filtration is one of the common approaches to reduce particle levels. Your car cabin is its own tiny “indoor space,” so a neglected filter often shows up fast.
Before you start: find the filter type and location
Before grabbing tools, figure out two things: where the filter sits and what style your car uses. Many vehicles place it behind the glove box, others hide it at the passenger footwell, and some put it at the base of the windshield under the cowl.
Quick ways to confirm location:
- Check your owner’s manual index for “cabin air filter” or “pollen filter.”
- Search your exact year/make/model plus “cabin filter location.”
- If you’re already shopping, use a parts catalog lookup to confirm filter dimensions.
Filter media also matters. Standard paper filters are fine for many drivers, while activated carbon versions can help reduce odors and some gaseous pollutants in many real-world situations, especially in heavy traffic.
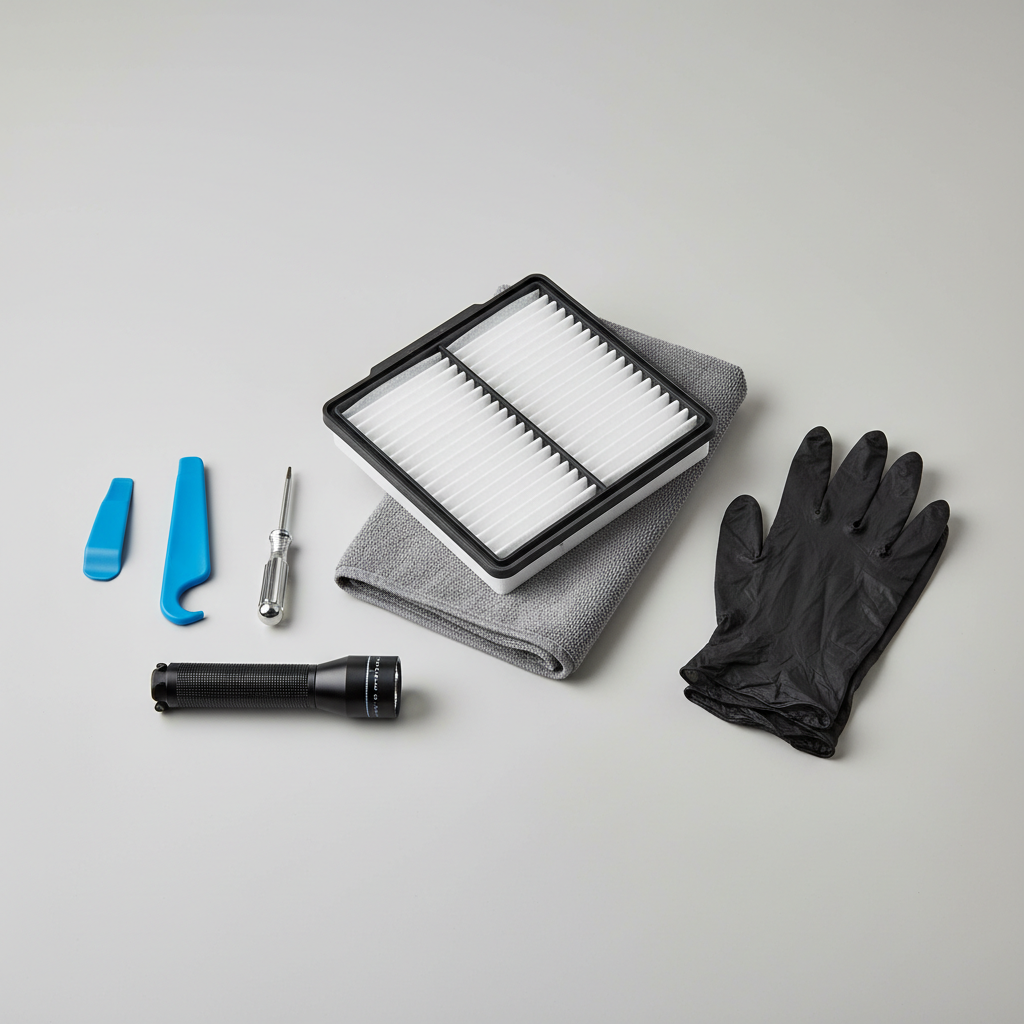
Tools and supplies checklist (keep it simple)
Most swaps take 10–25 minutes. The “tools” are often just patience and a decent light, but having the basics nearby prevents the glove-box-panel wrestling match.
- Correct replacement filter (match year/make/model)
- Flashlight or headlamp
- Trim tool or flat plastic pry tool (avoid metal when possible)
- Small Phillips screwdriver (some cars use screws)
- Vacuum with crevice tool or a damp microfiber towel
- Nitrile gloves (optional, helps with grime and allergies)
If you’re sensitive to dust, consider running the fan off and keeping the doors open while you work, it’s a small thing but it makes the job more pleasant.
How to replace cabin air filter: step-by-step (most common setups)
This is the part most people want, the clean sequence. You’ll still adapt it to your car, but the logic stays the same: access, remove, clean, install with correct airflow direction, reassemble.
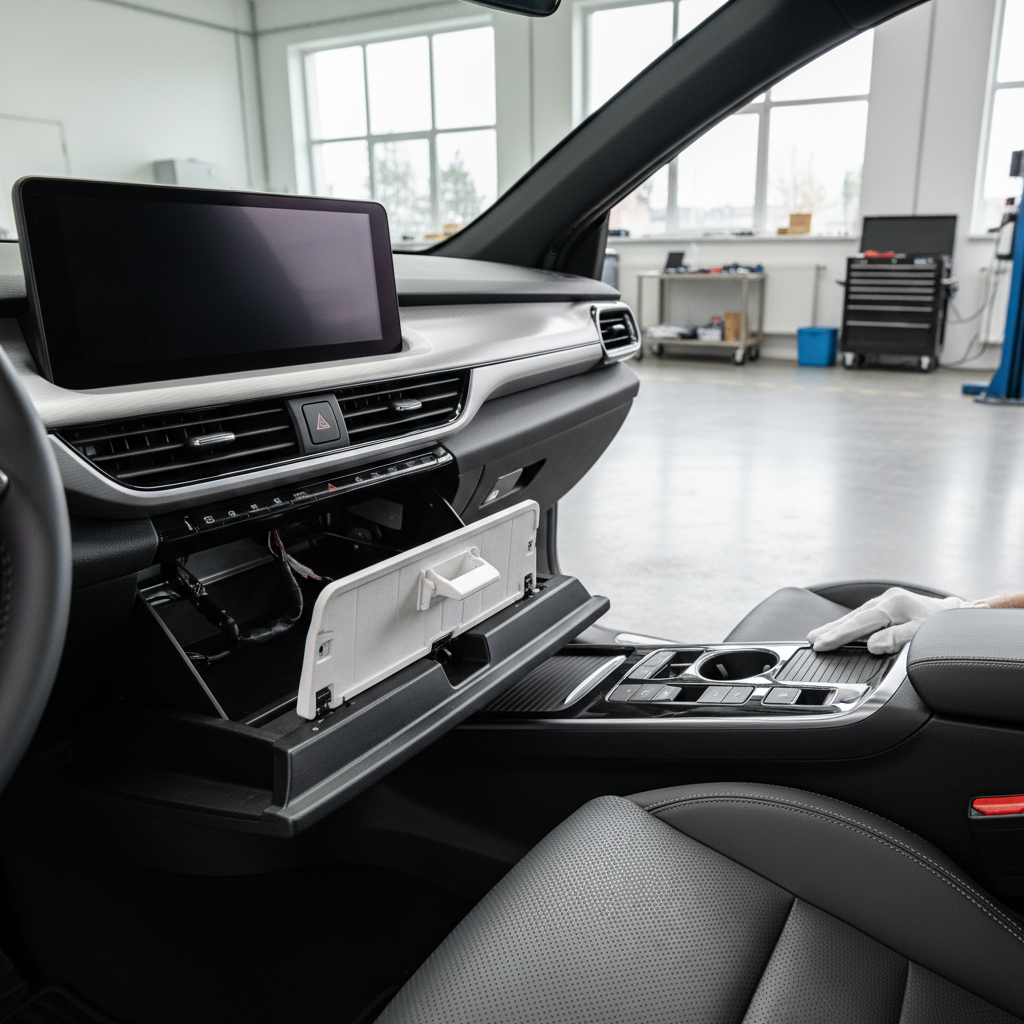
Option A: Behind the glove box (very common)
- Park on a level surface, turn the car off, and set parking brake.
- Empty the glove box so nothing falls into hinges or footwell.
- Release glove box stops: some have squeeze-in sides, others use a damper strap you unhook.
- Locate the cabin filter door (usually a long plastic cover), unclip or unscrew it.
- Slide the old filter out slowly to avoid dumping debris into the housing.
- Vacuum or wipe the filter cavity, don’t overdo it, just remove loose dust/leaves.
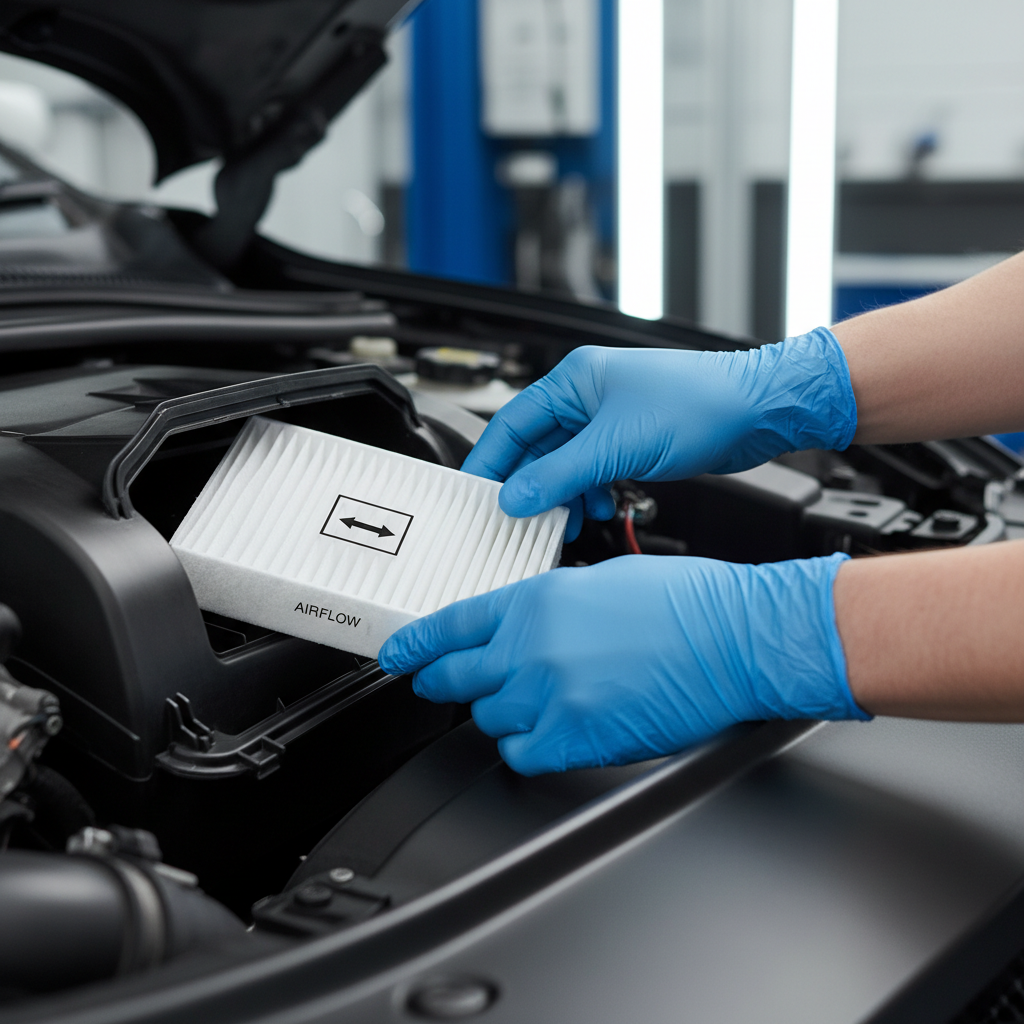
- Install the new filter with the airflow arrow pointing the correct direction (often “down” when mounted vertically).
- Reinstall the door, reattach the damper strap if present, then pop glove box back into place.
Option B: Passenger footwell access panel
- Move the passenger seat back for room and use a flashlight.
- Remove the lower kick panel or under-dash cover (clips or a few screws).
- Find the filter door on the HVAC housing, remove it, then pull the filter out.
- Clean the area lightly, install the new filter with correct airflow direction.
- Reinstall panels carefully, align clips before pushing to avoid breaking them.
Option C: Under-hood cowl (less common, but not rare)
- Open hood and locate the plastic cowl at the base of the windshield.
- Remove weatherstrip or fasteners as needed, lift the cowl section.
- Access the filter tray, remove old filter, clear leaves and debris.
- Install the new filter, reassemble cowl, make sure seals sit flat.
After reassembly, start the car and run the fan at a few speeds. If you hear a flap tapping or a buzz, a panel may not be seated, or the filter frame might be slightly misaligned.
A quick comparison table: standard vs. carbon cabin filters
If you’re standing in the aisle choosing between two boxes, this is usually the real decision. Fit is non-negotiable, but media choice depends on where and how you drive.
| Filter type | What it’s good at | Tradeoffs | Who it fits |
|---|---|---|---|
| Standard particulate | Dust, pollen, larger particles | Less odor reduction | Most drivers, normal conditions |
| Activated carbon | Particles + helps reduce odors and some fumes | Often costs more, can restrict airflow slightly when dirty | City traffic, wildfire season, smell-sensitive cabins |
One practical note: if you deal with smoke or persistent odors, a carbon filter can help, but it won’t “fix” a moldy evaporator core or a leaking heater box. If the smell returns quickly, the filter may be only part of the story.
Self-check: did you install it correctly?
This is where many DIY installs quietly go wrong, the car “works,” but the benefit is smaller than it should be. Use this quick checklist before you close everything up.
- Airflow arrow matches the housing direction (if unsure, check the old filter’s orientation)
- Filter sits flush with no bent corners or crushed pleats
- Cover/door fully latched, no gaps around edges
- No loose leaves or wrappers left in the cavity
- Glove box damper strap reconnected (if your model has one)
If you’re still learning how to replace cabin air filter without breaking clips, go slower on trim pieces than you think you need. A broken tab turns a 15-minute job into an annoying rattle hunt.
Common mistakes that waste time (or reduce airflow)
Some errors are obvious, others feel harmless until you notice airflow stays weak. These are the repeat offenders.
- Installing backward: it can collapse the pleats sooner and reduce filtration efficiency.
- Buying the “close enough” filter size: small gaps let air bypass the media.
- Forcing the glove box down: many stops release with a squeeze, forcing can crack hinges.
- Ignoring debris in the housing: leaves can end up in the blower and make noise.
- Over-sanitizing with harsh chemicals: strong cleaners near plastics and electronics can cause issues; if you need odor treatment, consider a shop that knows HVAC cleaning.
According to the National Highway Traffic Safety Administration (NHTSA), clear visibility is a key safety factor. A severely clogged cabin filter can contribute to weak defogging in some situations, so if your windows stay hazy longer than they used to, it’s worth addressing.
When to get professional help (it’s not “giving up”)
Replacing a cabin filter is usually low risk, but a few situations justify a shop visit, especially if you’re short on time or your vehicle design is frustrating.
- You can’t locate the filter housing after checking the manual and a model-specific guide.
- Trim panels feel like they will snap, or you already broke a clip and panels won’t sit flat.
- Persistent mildew smell continues even right after you replace the filter.
- HVAC blower noise persists, which could mean debris deeper in the system.
If odors or allergy symptoms are severe, it may be smart to talk with a qualified mechanic, and for health concerns, consider discussing triggers with a healthcare professional since cabin filtration is only one variable.
Conclusion: keep it simple, then keep it on schedule
Once you learn how to replace cabin air filter on your specific car, it becomes one of those easy wins: cleaner air through the vents, fewer smells, and HVAC that doesn’t feel like it’s struggling.
Two actions that make this stick: write the mileage/date on the filter frame with a marker, and set a reminder to check it during oil changes. Your future self will thank you, quietly, when the cabin still smells neutral in traffic.
Key takeaways
- Confirm location first (glove box, footwell, or cowl) to avoid breaking trim.
- Match airflow direction on the new filter, it matters more than people think.
- Choose carbon media if odors and fumes are a real daily issue, otherwise standard often works.
- If smells persist after replacement, the filter may not be the root cause.